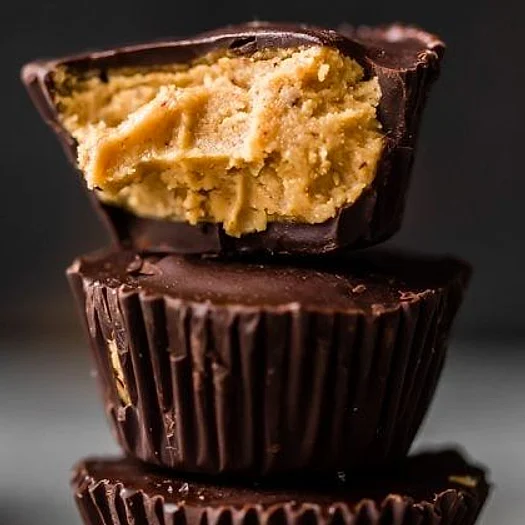
These homemade peanut butter cups are rich, creamy and deeply chocolatey, with a snap of dark chocolate over a soft, salty peanut center.
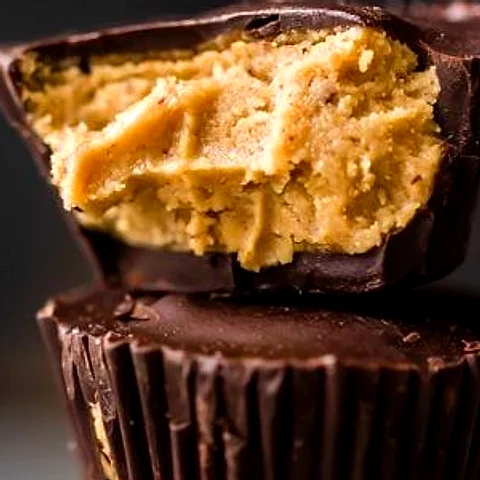
Made with just a handful of simple ingredients, they come together in about 30 minutes with no baking and no special equipment.
Why you’ll love this recipe
This is my go-to when I want something sweet without the sugar crash. The peanut butter filling tastes like the classic candy, but it is lower in carbs and fully plant based.
Ingredients
Full quantities are in the recipe card below.
- Dark chocolate (85%): Forms the crisp shell and keeps the sugar low. Substitute with another high cocoa dark chocolate bar, or a dairy free chocolate chip blend.
- Creamy natural peanut butter: Provides the filling and most of the protein. Substitute with almond butter for a different flavor.
- Pure maple syrup: Adds gentle sweetness that balances the bitter cocoa. Substitute with a few drops of liquid monk fruit sweetener to keep carbs even lower.
- Coconut flour: Thickens the filling so it holds its shape when chilled. Substitute with almond flour, using a slightly larger amount.
- Salt: Sharpens the flavors of both chocolate and peanut. Skip it if your peanut butter is already salted.
- Fancy sea salt: Adds a crunchy, bright finish on top. Substitute with flaky kosher salt.
How to make healthy peanut butter cups
Step 1: Prepare the mini cups
Line a mini muffin tin with 12 paper liners. Paper liners keep the cups neat and make them easy to remove once set.
Step 2: Melt the chocolate
Break the chocolate into pieces and melt it in a heatproof bowl over simmering water. Stir gently until smooth, which keeps the chocolate glossy.
Step 3: Make the filling
Stir together the peanut butter, maple syrup, coconut flour and salt if needed. The mixture should be thick and scoopable, and it firms up as it sits.
Step 4: Layer and chill
Spoon a thin layer of melted chocolate into each liner and freeze for 5 minutes. Add a small ball of filling, then cover with more chocolate so the filling is fully sealed.
Step 5: Set and sprinkle
Sprinkle with a pinch of sea salt while the top is still wet. Freeze for 20 minutes until firm, which keeps the centers from softening at room temperature.
Tips
- Use a quality bar: A high cocoa bar melts more smoothly and tastes less bitter once sweetened.
- Chill the first layer: A firm base stops the filling from bleeding through the chocolate.
- Keep the filling thick: If it feels runny, add another teaspoon of coconut flour so it holds its shape.
- Avoid water: Even a drop of water can make melted chocolate seize, so keep bowls and spoons dry.
- Taste the peanut butter first: Check for salt before adding any, since brands vary a lot.
- Use mini liners: Small cups give the classic bite-size shape and make portion control easier.
Storage & make ahead
Store the peanut butter cups in an airtight container in the fridge for up to two weeks. The chocolate stays firm and the centers stay creamy.
For longer keeping, freeze them for up to three months. Let them rest for 5 minutes before eating so the filling softens slightly.
Frequently Asked Questions
Are these peanut butter cups truly low carb?
Yes, they are low in carbs because they use a small amount of maple syrup and coconut flour. Check the label of your chocolate, since carb counts vary between brands.
Can I make these peanut butter cups without maple syrup?
You can use a few drops of liquid monk fruit sweetener instead. The texture stays the same, though the flavor will be slightly less caramel-like.
Why did my chocolate turn grainy?
Grainy chocolate usually means water got into the bowl or it overheated. Melt it slowly over gentle heat and keep everything completely dry.
Can I use crunchy peanut butter?
Yes, but the filling will be a little less smooth. Choose a creamy natural style if you want the classic candy texture.
How do I keep the cups from melting?
Store them in the fridge or freezer, especially in warm weather. They soften quickly at room temperature.
 Recipe byEva Montgomery
Homemade Healthy Peanut Butter Cups (Low Carb, Vegan, Gluten Free)
Ingredients
- 1 (3.5 ounce) 85% dark chocolate bar, dairy free if desired
- ½ cup creamy natural peanut butter
- ½ tablespoon pure maple syrup
- ½ tablespoon coconut flour
- Pinch of salt, if your peanut butter isn’t already salted
- Fancy sea salt, for sprinkling on top
Instructions
- Line a mini muffin tin with 12 paper liners.
- Break the chocolate into pieces and melt it in a heatproof bowl over simmering water, stirring until smooth.
- Stir together the peanut butter, maple syrup, coconut flour and a pinch of salt if needed until thick.
- Spoon about 1 teaspoon of melted chocolate into each liner and freeze for 5 minutes until set.
- Add a small spoonful of peanut butter filling to each cup, pressing gently to flatten.
- Spoon the remaining melted chocolate over the filling to seal it completely.
- Sprinkle each cup with a pinch of fancy sea salt while the chocolate is still wet.
- Freeze for 20 minutes until firm, then store as directed.
Notes
- Use a dairy free dark chocolate to keep the recipe vegan.
- Swap the maple syrup for liquid monk fruit sweetener to lower the carbs further.
- Store in the fridge for up to two weeks or the freezer for up to three months.